Often you want to get information from the player from a form. Here we will go through some of the common form inputs you may need in your game.
Create a scene that contains all the form elements that you need.
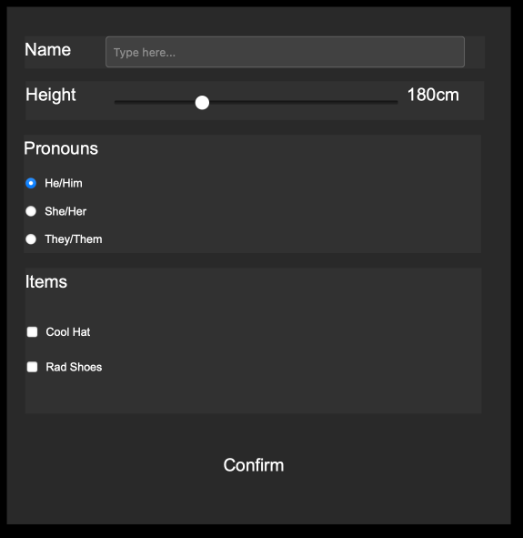
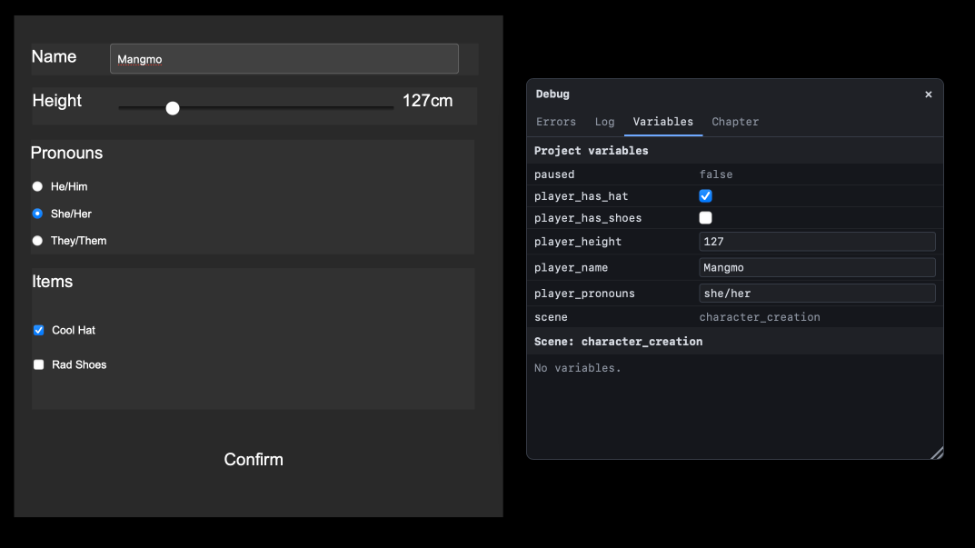
We will use this form layout in this tutorial for you to understand the basic inputs.
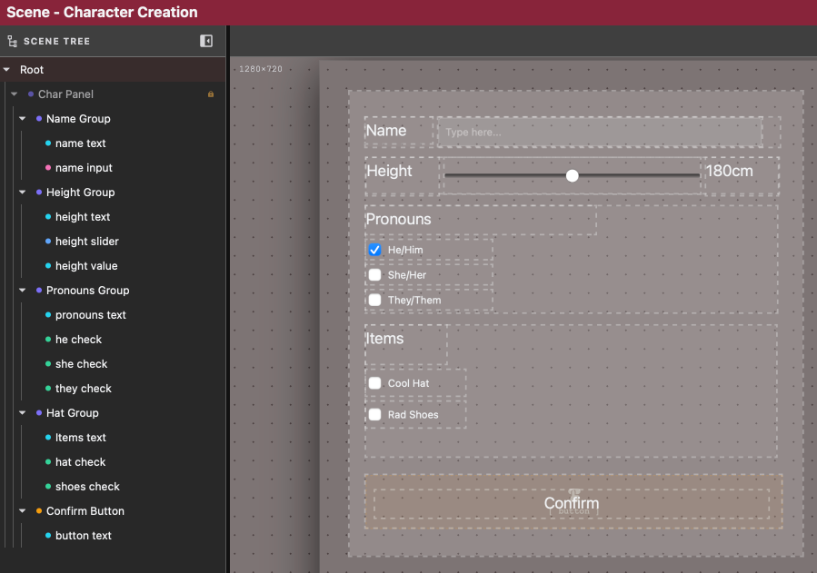
We have:
- Name (text input)
- Height (slider)
- Pronouns (multi choice check boxes)
- Items (a series of true/false values)
- A confirm button
Create your form set up simuliar to this to follow along.
Variables
Next you need to set up the variable to store the information in. Open the Variables Manager.
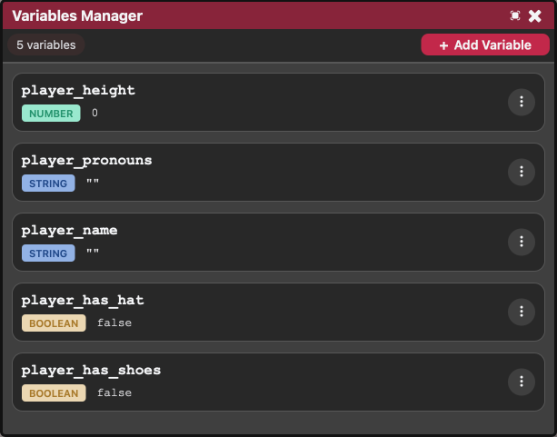
Here you will set up all your variables.
- Player height will be a number
- Player name and pronouns will be a string
- Items will be their own boolean values
Setting up the Button
We need to make a event to happen once the button is pressed.
Select the button in the Scene Tree and look at the BUTTON section in the inspector.
Change the Action dropdown to Event.
And give the Event a name of onConfirmPress. This will be the name of the function in the code that gets called when this button is pressed.
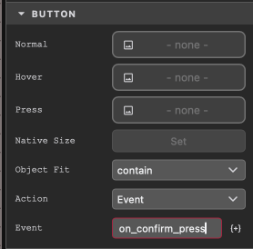
To automatically create this function, press the small Plus Button to the right of the Event Name.

You should be taken to the Code View for the scene showing your new function.
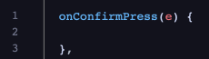
To toggle between the scene and code view you can click the code button:

Reading the players Name
When the user presses the button we want the code to check what is written in the name box and save it to the store.
Any time we want the code to be able to access something in the scene, we need to give that something an id.
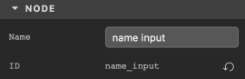
In the scene view, select the name input and look at the ID in the Inspector
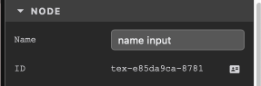
Every item gets a random ID, but we want to give it a more memorable one.
Click on the id button to the left of the ID.

This will allow you to enter your own ID in. ID's are need to be lower case without any spaces, and unique to any other ids in the scene.
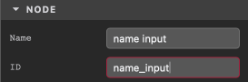
Press Enter to confirm the ID.
Code
Back in the Code View we can now read from this input and save its value into the game's Variable Store.

Let's break these two lines down.
First Line
The first line reads from the input box and stores it in a temporary variable for us to use in the next line.
let playerNameTemp is saying make a new temp variable called playerNameTemp.
thisRefers to this scene..domIs the object that manages all the items in the scene (Document Object Model).name_inputIs the id we gave our text input.valueIs the property of the text input we want to read, in this case its value.
So in summary we are asking this scene's dom for the text content of the name input field and storing it a temporary variable called playerName.
Second Line
This line stores the playerName in the Variable Store.
StoreIs the Variable Store.SetIs the command to write a value to the store, this is followed by brackets that contain:player_nameThe variable name we want to storeplayerNameTempIs our temp value from the previous line.
Testing
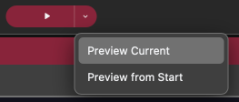
We can test this process by previewing the current scene. Click on the Preview Button Dropdown and selecting Preview Current to only run this scene.
(I suggest doing this after each change you make to ensure it's working correctly)
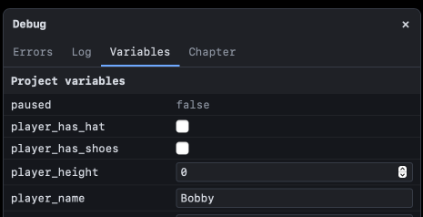
Once running you can view the Variable Store by clicking on the Debug View button on the right side of the preview window
 This will show an info box on everything that's running behind the scenes.
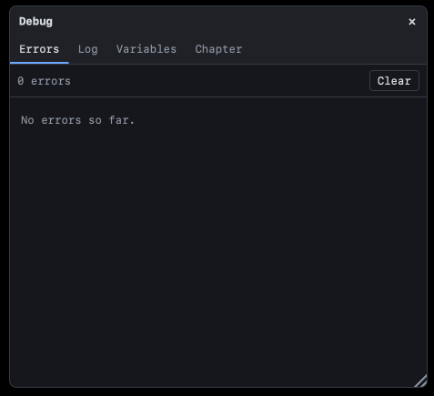
Click on the Variables tab to see a live view of the Variable Store.
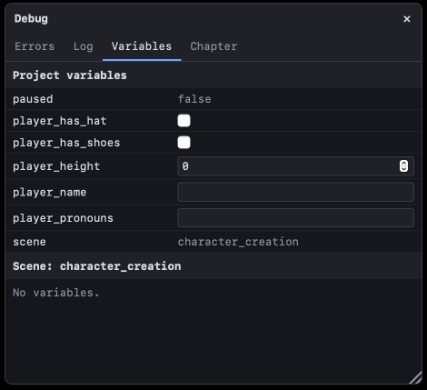
Now when you enter a name in the input field and press the Confirm button you should see the Variables Store update with the new value.

Single Checkboxes
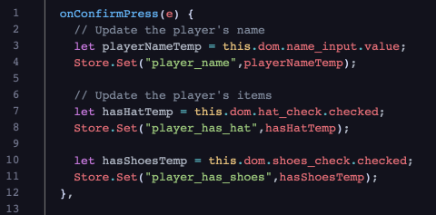
For the item checkboxes (checkboxes that don't effect each other) we can do very similar code (don't forget to assign the ID's to the form elements).
Group Checkboxes
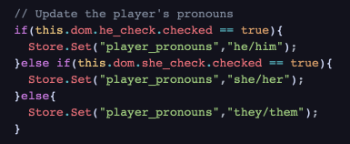
For the pronoun checkboxes, the first part is is a case of checking to see if one of them is checked, and if not check the next one until we find one that is checked.
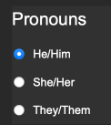
The other thing we need to ensure that only one item can be checked at once. We can do this by putting them all in a group.
For each, select it in the inspector and set the CHECKBOX → Group ID to any group id that you wish, just ensure it's the same id used with all the checkboxes.

Now when you run the scene you will only be able to select one option at a time.
Slider
The slider is also very simple
You will first want to change the settings on the slider to give it a maximum and minimum value:
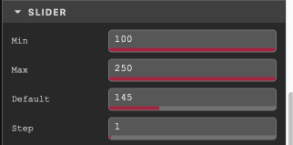
And after giving it an ID as normal, you can just read the value from it and save it to the Store.

You will also want to update the text beside the slider to match the value of the slider.
Give that Text Element an ID of height_value_text so that we can update it from the code.
Just like you learned with buttons, we can call events on sliders. In the Inspector under On Change you can set a function to be called when the slider value is changed.
Here we set it to onHeightSliderChange

and in the code we put in a couple of lines inside this function.

The first line just reads the slider as normal. The second updates the text element with the slider value and adds "cm" to the end of it.
Complete
That's it. You can now read these values in your Chapters and other parts of your game.
Full Code:
onConfirmPress(e: Event) {

  // Update the player's name
  let playerNameTemp = this.dom.name_input.value;
  Store.Set("player_name",playerNameTemp);

  // Update the player's items
  let hasHatTemp = this.dom.hat_check.checked;
  Store.Set("player_has_hat",hasHatTemp);

  let hasShoesTemp = this.dom.shoes_check.checked;
  Store.Set("player_has_shoes",hasShoesTemp);

  // Update the player's pronouns
  if(this.dom.he_check.checked == true){
    Store.Set("player_pronouns","he/him");
  }else if(this.dom.she_check.checked == true){
    Store.Set("player_pronouns","she/her");
  }else{
    Store.Set("player_pronouns","they/them");
  }

  //Update the player's height
  let heightTemp = this.dom.height_slider.value;
  Store.Set("player_height",heightTemp);
},

onHeightSliderChange(e: Event) {
  let playerHeightTemp = this.dom.height_slider.value;
  this.dom.height_value_text.textContent = playerHeightTemp + "cm";
},