Source control (also known as version control) is the practice of tracking, organising, and managing changes to source code and files over time. You can think of it as a time machine or a project-wide "undo" button for your work.
Git is the most popular type of Source Control, this tutorial is to set you through how to set up a project with Git and upload it to Github.
- The first section is how to set up your project to work with git.
- Next is how to create an account with Github.
- The final section is how to use Github Desktop, a program that allows you to upload and download your changes to Github. Github Desktop is one of many programs that can do this, and at the bottom we have a list of other popular programs that may work better for you.
Adding git files to your project
To use GIT with a project, you need a hidden folder added to it with some basic details. Mammut can set this up for you:
- New projects: tick Initialise Git when creating the project.
- Existing projects: open Project Settings, go to the Git tab and press Add next to Add Git Files.
This adds a git repository and a .gitignore file to the project folder. (A file that tells GIT what files to backup and what to ignore).
Your project needs to be saved in a folder on your computer. Projects saved in Browser Storage can't be git accessed.
Creating a Github account
First you are going to need a Github account, it’s free and easy to set up. In a web browser go to: https://github.com/
On the homepage click on the Sign up button.

Enter your email address when prompted.
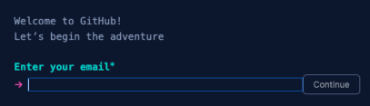
And create a password for your account.

You now need to provide a unique username for your account

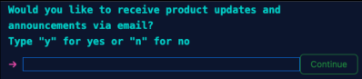
And confirm if you want to receive marketing emails from them. (type n).
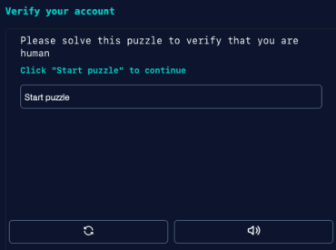
Github should then ask you to verify your account proving you are not a robot. Just follow the prompts given.
Once they confirm that you are not in fact a robot, you can then click on the Create account button.

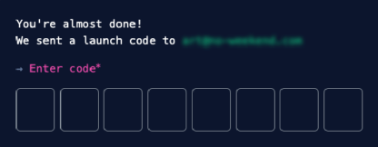
Github will send you an email with a confirmation number in it, find it and enter it in the provided section.
The next questions are just so they know why you are using Github. Just inform them that you are Just me, that you are a Student and that you want to use Github for Collaborative coding.
Then click the Continue button

And confirm that you only want to use the free version of Github by clicking the Continue for free button.

That’s it, you should now have a Github account to use. Now we just need to upload your project to their servers.
For that we need a new program called Github Desktop.
Github Desktop
There are many programs to manage your Git projects, and Git can even be run via command line. But it’s much easier to use a visual program such as Github Desktop.
Note that Github Desktop is only available for Windows and Mac. For a list of alternative programs see the end of this wiki page.
Setting up Github Desktop
Go to the Github desktop website: https://desktop.github.com/
Press the Download for macOS or the Download for Windows (64bit) button to download the installer.

or

Once downloaded, install the software as you would normally and then launch the software once finished.
Signing in to Github Desktop
Github Desktop needs to know which Github account to upload to.
Open the GitHub Desktop menu and click Settings. On Windows, open the File menu and click Options.
Go to the Accounts section and click Sign Into GitHub.com, then click Continue With Browser.
Your web browser will open. Sign in with the account you just made and follow the prompts to go back to Github Desktop.
Adding your project to Github Desktop
In Github Desktop, open the File menu and click Add Local Repository.
Click Choose... and pick your project's folder. This is the folder with project.json and the assets folder inside it.
Click Add Repository.
If Github Desktop says the folder isn't a repository, the git files are missing. Go back to the Adding git files to your project step above.
Making your first commit
A commit is a saved snapshot of your project. You can always go back and see what your project looked like at any commit.
First, save your project in Mammut.
In Github Desktop, the Changes tab on the left lists every file that has changed. For your first commit, this is every file in the project. Leave them all ticked.
At the bottom left, type a short message into the Summary box, such as First commit.
Click Commit to main.
Publishing your project to Github
So far the commit only exists on your computer. To upload it, click Publish repository in the bar at the top of Github Desktop.
- Name: the name of the project on Github. It starts as the folder's name.
- Description: optional.
- Keep this code private: leave this ticked so only you can see the project. Untick it if you want anyone to be able to see it.
If there is an Organization option, leave it as None.
Click Publish Repository. Your project is now on Github, and you can see it on your profile at https://github.com/.
Saving your work to Github
Each time you want to back up your work:
- Save your project in Mammut.
- In Github Desktop, check the list of changed files.
- Type a Summary saying what you changed, such as
Added the forest scene. - Click Commit to main.
- Click Push origin in the bar at the top to upload the commit to Github.
It's best to commit little and often. Small commits with clear messages make it much easier to find the point where something went wrong.
Working on another computer
To get your project on another computer:
- Install Github Desktop and sign in, as above.
- In a web browser, go to your project's page on Github.
- Click the Code button, then Open with GitHub Desktop.
- In Github Desktop, click Choose... to pick where the project should go, then click Clone.
- In the Mammut Project Hub, click Open Folder and pick the project's folder.
When you go back to a computer, get the latest changes before you start work:
- Close the project in Mammut.
- In Github Desktop, click Fetch origin. If there are new commits, the button changes to Pull origin. Click it to download them.
- Open the project in Mammut again.
Mammut doesn't see files that change while a project is open, so always close the project before pulling.
Always push your work before you switch computers, and pull before you start. If both computers change the same file without syncing, you'll get a conflict, and Github Desktop will make you sort it out before you can carry on.
Things to know
- Builds aren't uploaded. The
.gitignorefile tells git to skip thebuildfolder, so your exported games stay on your computer. - Large files. Github blocks any file larger than 100 MB and warns about files over 50 MB. Keep videos and audio files small. Github also recommends keeping a whole project under 1 GB.
Other Popular Git Programs
Github Desktop is a good place to start, but there are plenty of other programs. They all work with the git files Mammut adds and with Github, so you can switch at any time. Whichever one you use, remember to close your project in Mammut before pulling.
Github Desktop only runs on macOS and Windows. On Linux, try GitKraken, Sublime Merge, Visual Studio Code or the command line.
| Program | Works on | Cost |
|---|---|---|
| Sourcetree | macOS, Windows | Free |
| GitKraken Desktop | macOS, Windows, Linux | Free for public projects, paid for private ones |
| Fork | macOS, Windows | Free to try, then a one-off payment |
| Tower | macOS, Windows | Subscription with a 30-day free trial, free for students |
| Sublime Merge | macOS, Windows, Linux | Free to try, then a one-off payment |
| Visual Studio Code | macOS, Windows, Linux | Free |
| TortoiseGit | Windows | Free |
| Git (command line) | macOS, Windows, Linux | Free |
Sourcetree is a free program from Atlassian. It has more features than Github Desktop, so it's a good next step once you're happy with the basics.
GitKraken Desktop shows your project's history as a colourful graph, which makes it easy to see what happened when. The free plan only works with public projects, so you'll need a paid plan if your project is private. Students can get it free for 6 months through the GitHub Student Developer Pack.
Fork is a fast, tidy program with a clean layout. You can try it for free before buying it.
Tower is a polished program aimed at professionals. It's a paid subscription, but students can use it for free.
Sublime Merge comes from the makers of the Sublime Text editor. It's very fast and also runs on Linux. You can try it for free before buying it.
Visual Studio Code is a free code editor with git built in, under its Source Control view. It's handy if you already use it to write your project's scripts. You'll need to install Git first.
TortoiseGit works differently from the others. Instead of opening a separate window, it adds git commands to the right-click menu in File Explorer. It's Windows only, and you'll need to install Git for Windows first.
Git on the command line means typing commands into a terminal. It's the hardest place to start, but it can do everything, and most git guides online use it.